projects - decoupage letters
découpage letters

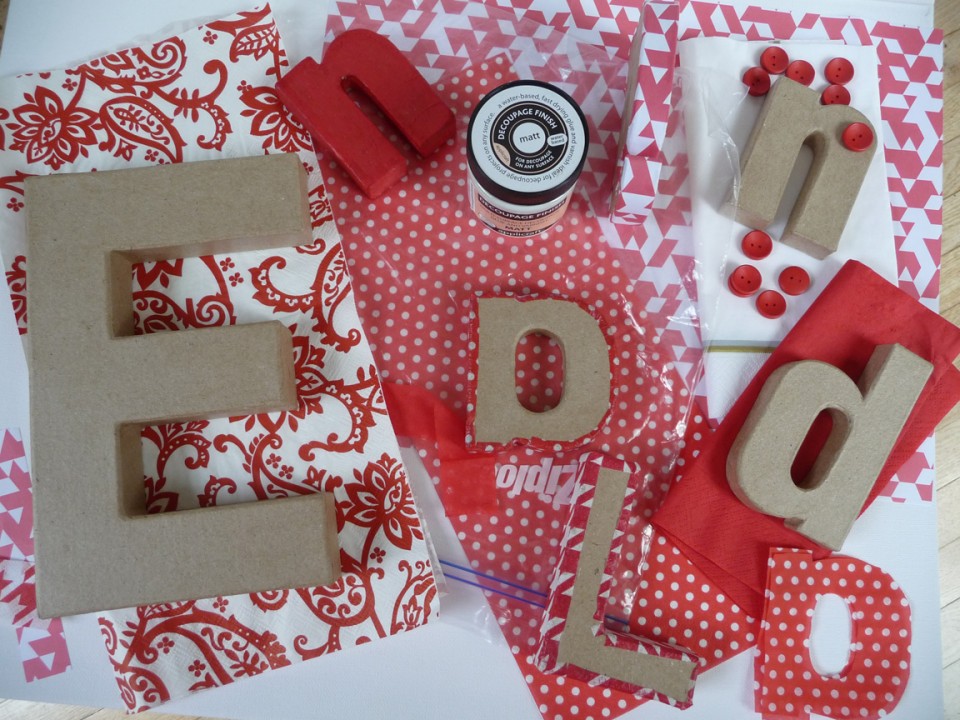
Here we have used paper napkins, and where we didn't have enough, we used gift wrap.
 |
 |
 |
| Letters of the alphabet can be bought at craft shops. Here we have our selection of papers and letters along with buttons for fun. |
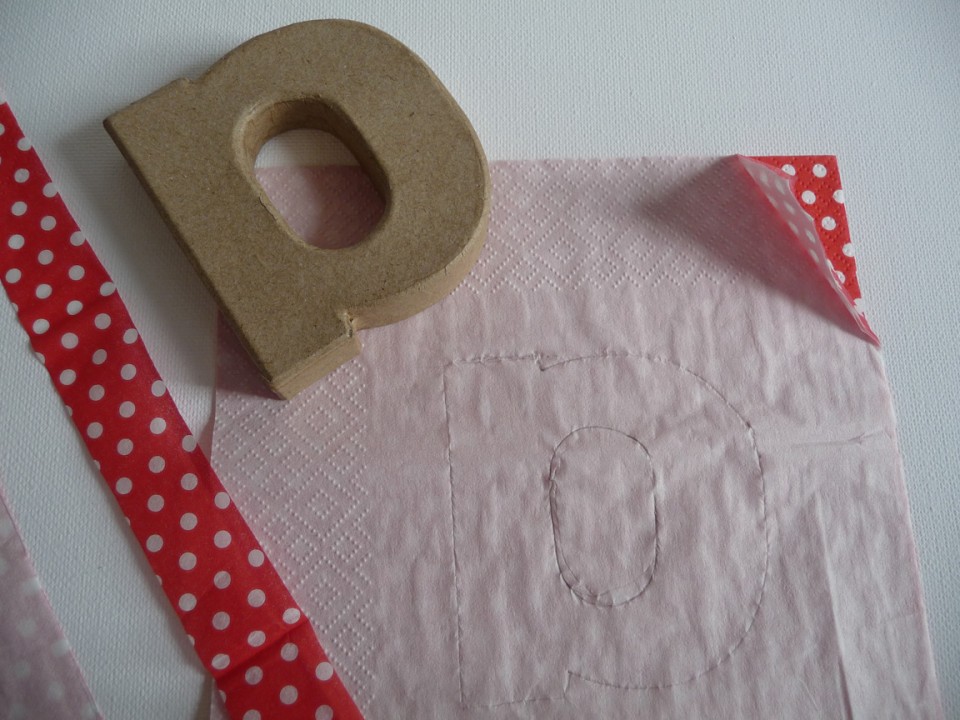
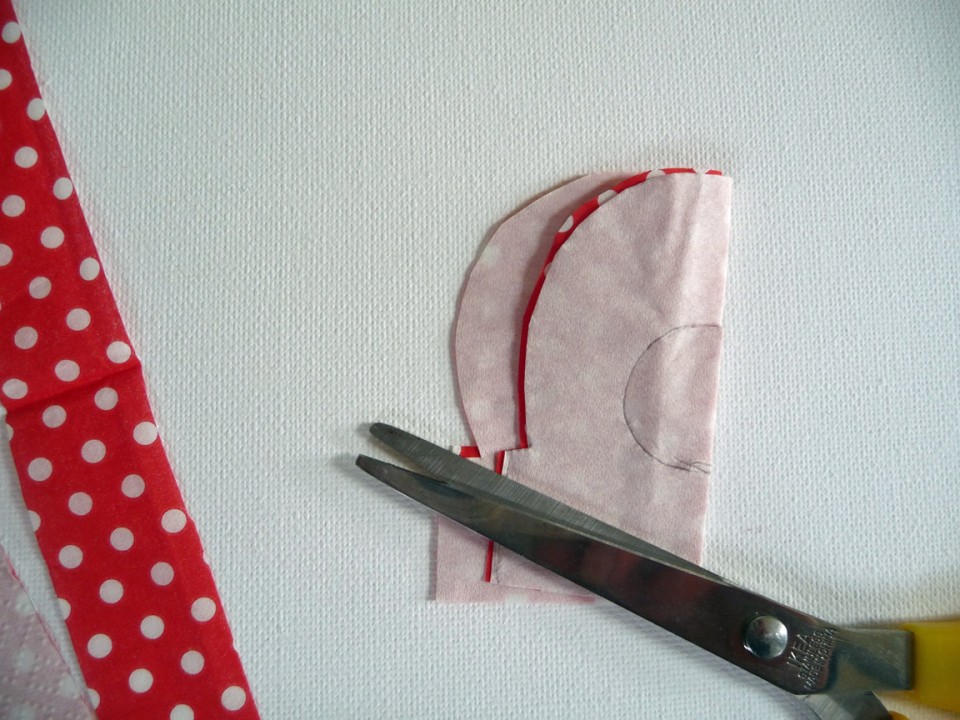
Lay out the letter on the wrong side of the paper and draw around it. We also cut a couple of strips just wider than the width of the letter. |
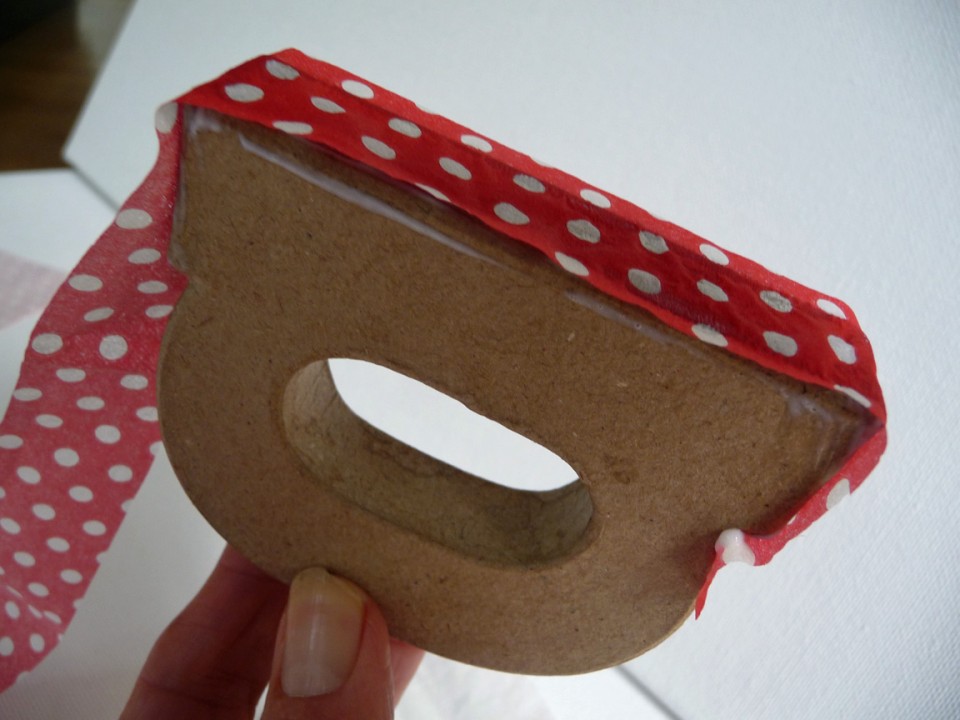
Apply the decoupage finish to the side of the letter and then place the long strip on the outside edge. Use a kebab stick to gently push or roll the paper into any indents. |
 |
 |
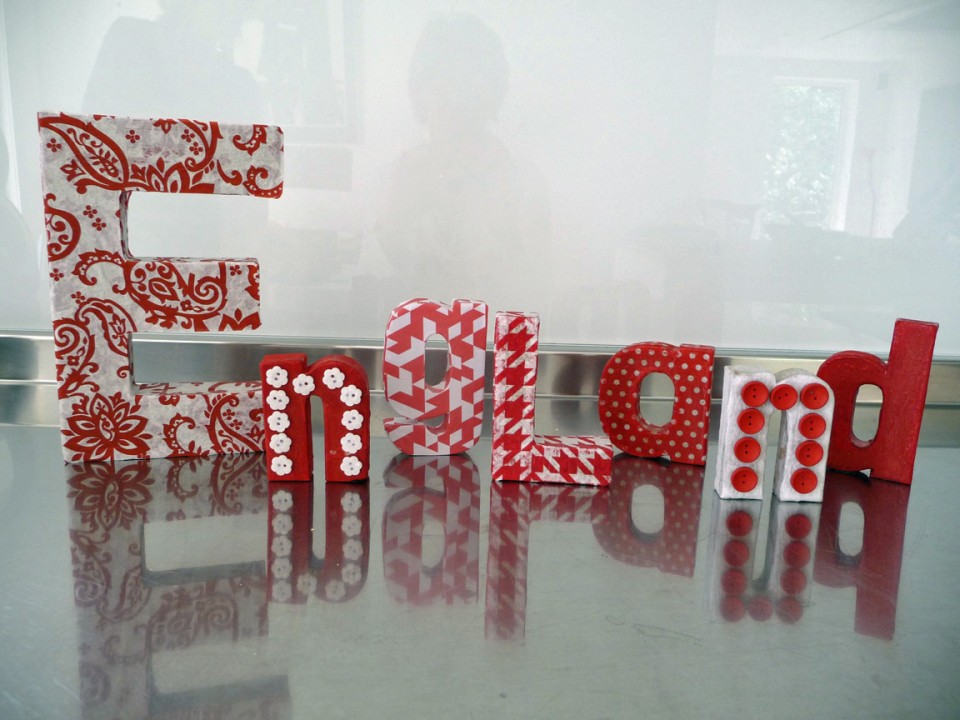 |
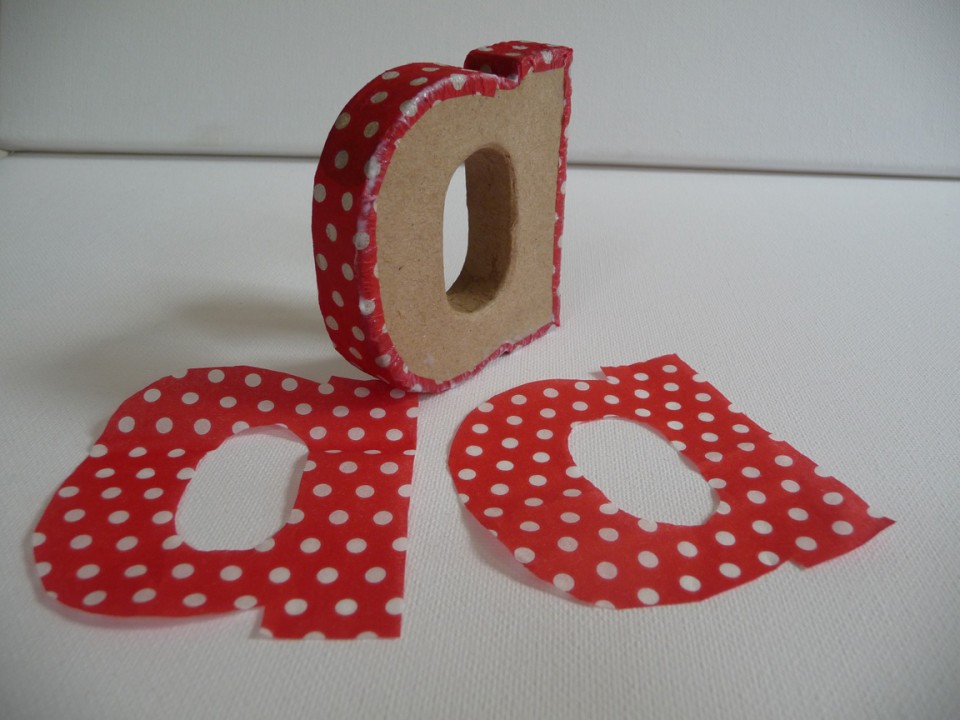
| We folded the napkin in two before we drew around the edge so that we would get two paper shapes with one cut. After cutting the shape, split the napkin and only use the top coloured layer. These get decoupaged to each of the sides using only a thin coat of either matt or gloss decoupage finish. | To cut out the centre of the letter, fold it over so that you can nip the paper through all the layers. This creates the starting point to cut around the inside line of the centre which should be done carefully with the tip of the pair of scissors. | We photographed "England" on a stainless steel surface and were delighted to see the letters reflected on the surface. Note that the two n's have buttons glued to their surface: red buttons on the white and white buttons on the red one. We used appliglue clear glue. |


