projects - tabby cat door stop
tabby cat door stop
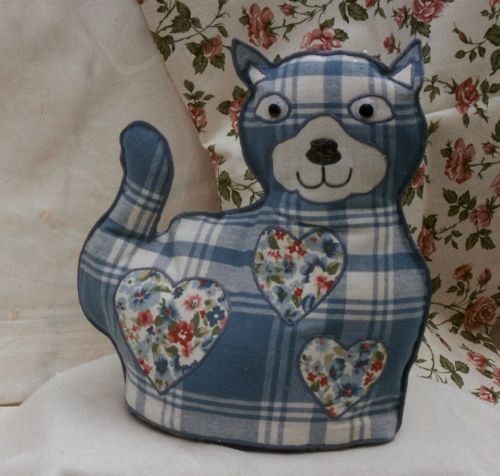
Our finished kitty door step is 34cm high x 29cm from left to right at the widest part. The oval at the bottom is 18cm x 15cm.
If you would like to try your hand at making tabby, decide what size you would like, and either enlarge or minimise the template below. If you would like, request a pattern when you order the Appliglue. In fact you could make a whole family of different sized kitties!
We used no. 63 Smokey Blue for the kitty on the left. For the one on the right Dusky Rose, Sweet Green or Sage and Oyster. the nose is black Appligllue.
you will need
1. A piece of fabric for the cat (front and back) and base (50cm x 45cm). this will depend on how big the tabby is going to be.
2. A different piece of fabric for the hearts, about 20cm x 14cn
3. A small amount of calico or old sheeting for face, ears and eyes 10cm x 6cm
4. A 45cm strip of 1cm sticky-backed Velcro
5. Stuffing, a stapler, two plastic eyes or a rhinestone or button.
6. A piece of 2oz wadding 16cm x 11cm.
7. Appliglues no. 6 clear, no. 1 black, or one of the browns if preferred for the nose area, and then a colour to match your fabrics.
8. Stiff card 16cm x 11cm for the base
9. A strip of thinner card 47cm x 3 cm for the sides of the base.
10. A piece of stiff card 30cm x 30cm covered with plastic like a shopping bag, to work on.
method
1. Cut out the paper patterns A to E.
2. Pin the patterns to your fabrics and cut out the front (A) and the back (B) of the cat, the base (D), hearts, face, ears and eyes (E). Remember to reverse the pattern for the back of the cat.
3. Place the front of the cat, right side up, on the 30cm square card. Position the hearts, face, eyes and ears. As you can see we have a different number of hearts on each of the kitties.
4. Starting from the top, glue each piece in place by scratching a thin line of the clear glue along the underneath edge of each piece.
5. When all the pieces are in position, starting from the top, apply the coloured appliglue around all the exposed edges of the hearts, mouth, eyes and ears. You are edging the hearts with colour. Scratch a little of the coloured Appliglue along the bottom of the kitty to seal the raw edge. It's the perfect fray check.
6. Do the same with hearts on piece of fabric for the back, or leave the back without hearts if so preferred.
7. Stick the plastic eyes in place on the front using the clear appliglue. Mark nose and mouth with the black appliglue(or colour of choice). If preferred use buttons, rhinestones, a piece of fabric or even a little piece of wood for the eyes. If the eyes are very big, scratch the fabric where the eye is going to go with the tip of the glue bottle.
8. Leave your project to dry for 4-6 hours.
9. Scratch a thin line of the clear glue along the edge of the other 3 sides of the front of the cat on the wrong side.
10. Put the wrong sides of the front of the cat on top of the wrong side of the back of the cat. The back will be 1cm larger all round except at the base.
11. Apply the coloured appliglue around all the exposed edges except along the bottom. The right sides will be facing outside now.
12. Allow to dry for 4-6 hours.
13. Cut around the glued edge to remove surplus fabric from the back of the cat.
14. Scratch a little of the coloured glue around the sides and bottom of the cat to seal any of the raw edges missed.
15. Cut out oval base from stiff card (pattern C). Using masking tape to secure the 3cm strip of thinner card around the edge of the base to make a shallow tray.
16. Cut out a piece of 2oz wadding the same size as patttern C. Stick this to the centre of the bottom of the tray using small dabs of the clear glue.
17. Cover the base and sides of the tray with the same fabric as the cat (pattern piece D). Staple or glue this to the cardboard.
18. Stick one part of the strip of the stick-backed velcro around the outside of the tray.
19. Stick one part of the strip of the sticky backed velcro inside the bottom edge of the cat.
20. Stuff the cat. Conventional toy stuffing can be used but equally effective are a pair of old tights!
21. Attach the body to the tray using velcro.


