projects - patchwork house
appliglue patchwork house quilt, wall hanging or cushion
 |
 |
(instructions are for making a cushion but these can be adapted for a quilt or a wall hanging)
you will need
1. 1 piece calico approx 43 x 106cm
2. 3 pieces cotton fabric squares
3. House template sheet
4. Appliglue no.6 Clear
5. Appliglue no.23 Oyster
6. Colour chart and instructions
7. Florist wire
8. Firm cardboard approx 60 x 40cm
preparation
1. Cut calico into 3 pieces A 43 x 43cm, B 43 x 33cm and C 43 x 30cm
2. Cut out each of the template patterns
3. Transfer them onto the card/template plastic
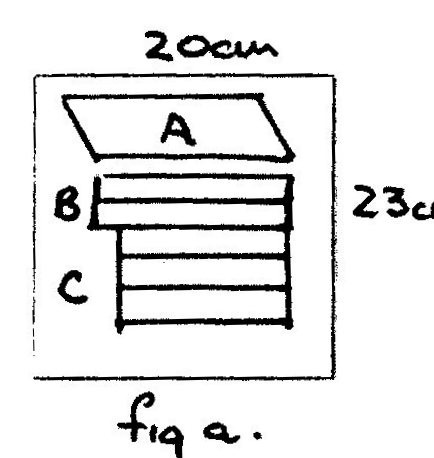
4. Refer to fig a for layout of dark fabric pieces
5. Refer to fig b for layout of light fabric pieces
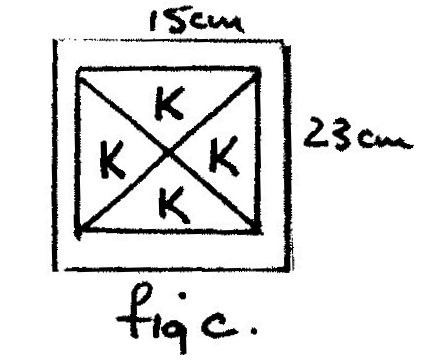
6. Refer to fig c for layout of corner triangles
7. On the wrong side of the fabric draw around the template accuatetly with a sharp pencil
8. Check the size of the template by placing over the shape of the original drawing
9. Cut out. No seam allowance is necessary.

method (double glue technique)
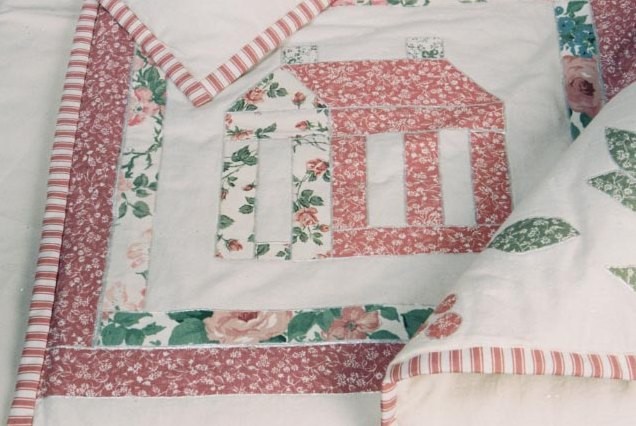
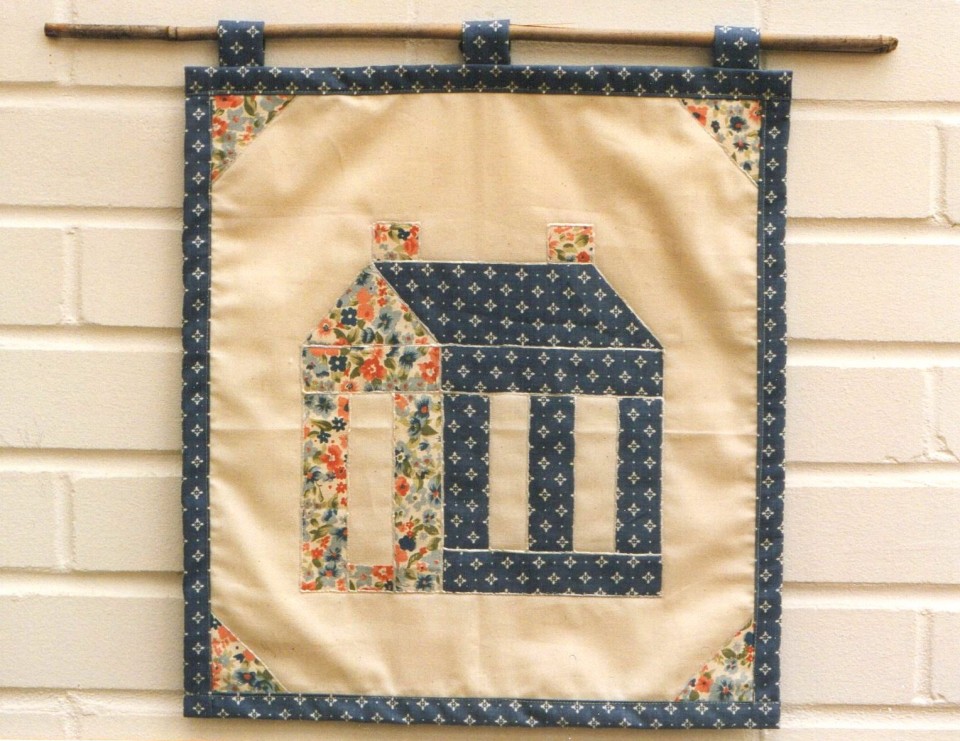
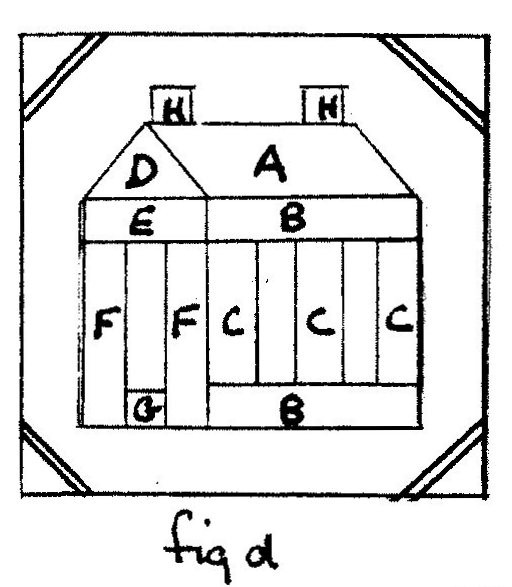
Place the largest piece of calico A on cardboard and peg at the top to secure. Following the measurements (fig d) place each piece of fabric in position until the house is complete. Ensure there are no creases. Iron if necessary. The pieces should meet with no overlap
check appliglue faqs for tips on using Appliglue
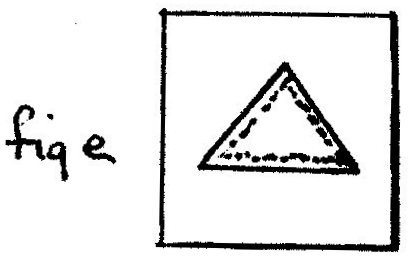
1. Working from left to right, remove a pattern piece and turn it over
2. Using Appliglue Clear no. 6 scratch a thin line around the under edge. Place it back into position (fig e
3. Repeat on each piece until the house is completed.
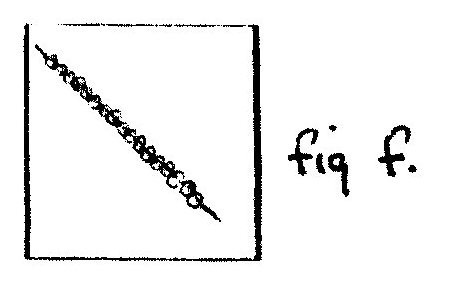
4. Study fig f and proceed to glue, using no. 23 Oyster as follows; using the nozzle in a downward movement, half on the motif and half on the base fabric like straight machine stitching, work in straight lines from the top of the house downwards
5. Repeat until every raw edge has been covered.
6. While the glue is drying, place the triangles C in the corner with the raw edges matching
7. Place the thin strip in position as in fig d
8. Run the no. 6 clear on the underside of both pieces and place back in position
9. Using the no. 23 Oyster glue the strip.
finishing off & assembly
Calico Piece A - patchwork house completed
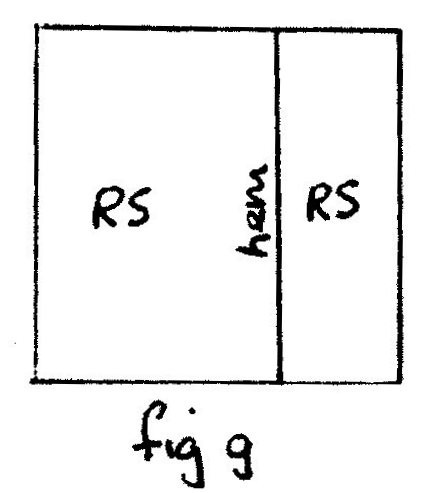
Calico Piece B - create a hem
- turn under half a centimetre on a 43cm edge
- Fold over this edge again
- Pin, baste and stitch down this hem
Calico Piece C - as for piece B
1. Place B on C with hems overlapping to form a square, 43 x 43cm (fig g)
2. Baste
3. Place calico piece A on top of pieces B and C with right side facing and raw edges matching
4. Pin, baste and stitch together all around with a 1cm seam
5. Press
6. Cut diagonally across the corners to reduce bulk
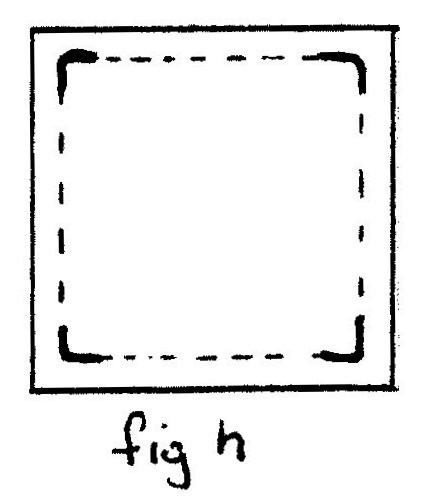
7. You may wish to work a little extra stitching at these points for reinforcements (fig h)
8. Turn to the rights side through the opening
9. Insert cushion
hints & tips
- Read the instruction leaflet well & refer to appliglue faqs
- Wash and iron all your fabrics
- Experiment and familiarise yourself with the glue and the technique before beginning your project
- To protect clothing wear an overall


