projects - appliglue glasses case
Glasses Case – crazy patchwork
you will need to
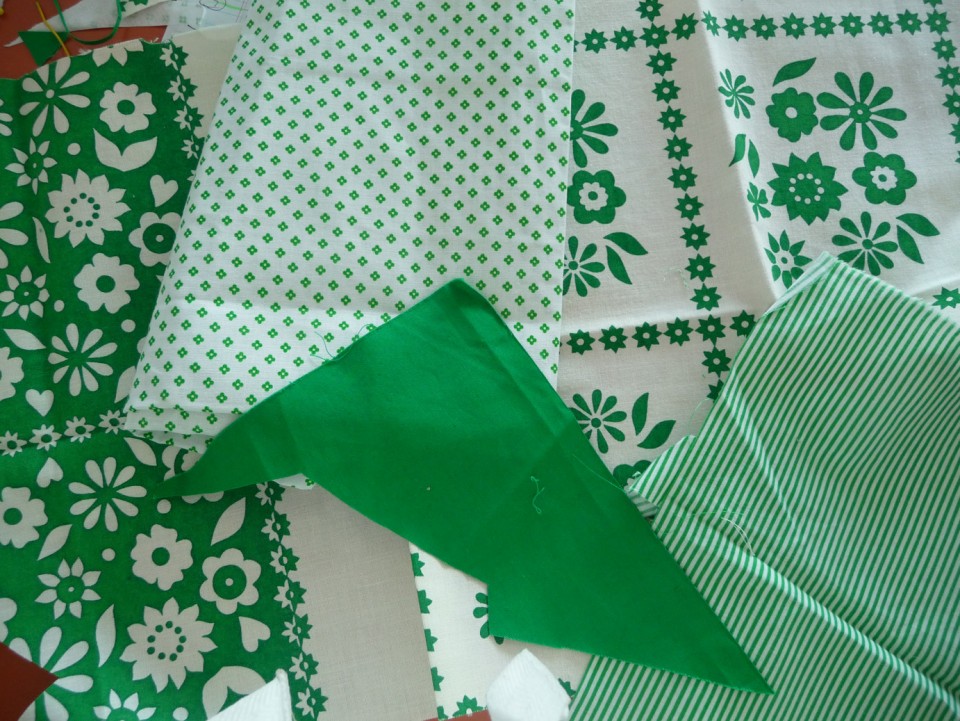
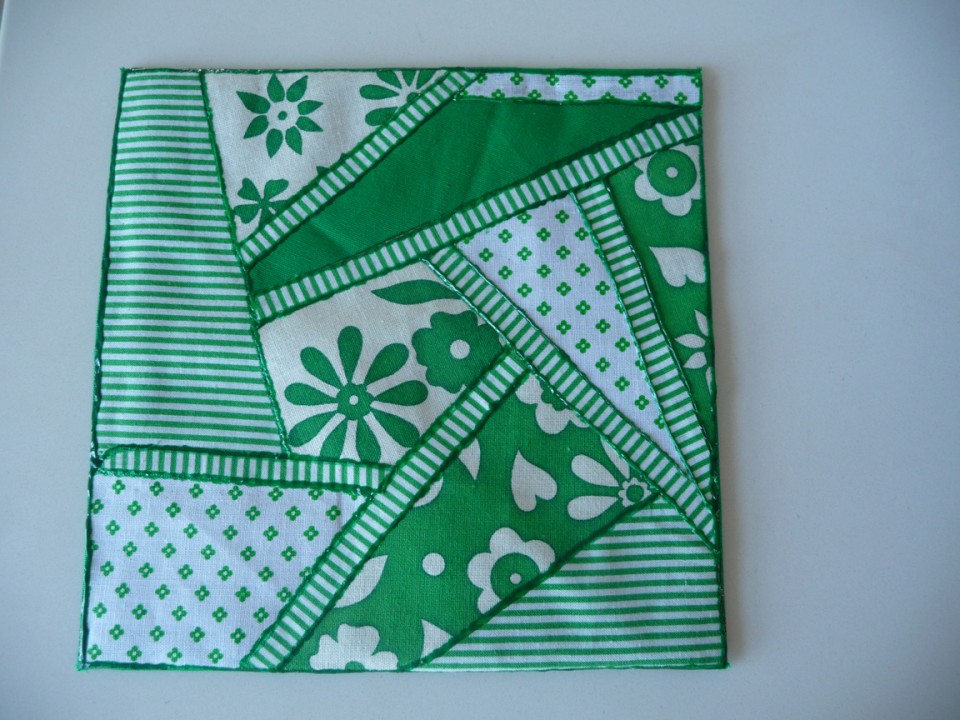
| Find 4 or 5 different patterned fabrics that work together. In our first glasses case we used 5, but when we decided to make the bright and breezy green one for spring and we couldn't find a 5th fabric that we loved, we played around with the pieces and found that 4 colours worked perfectly well. |
 |
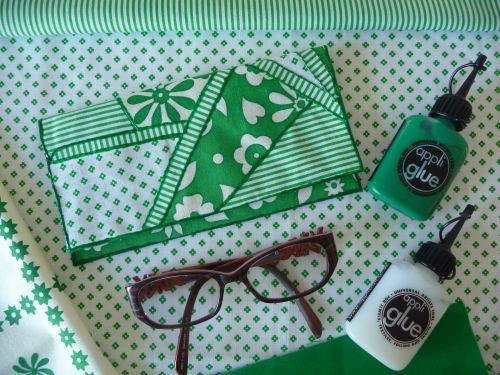 |
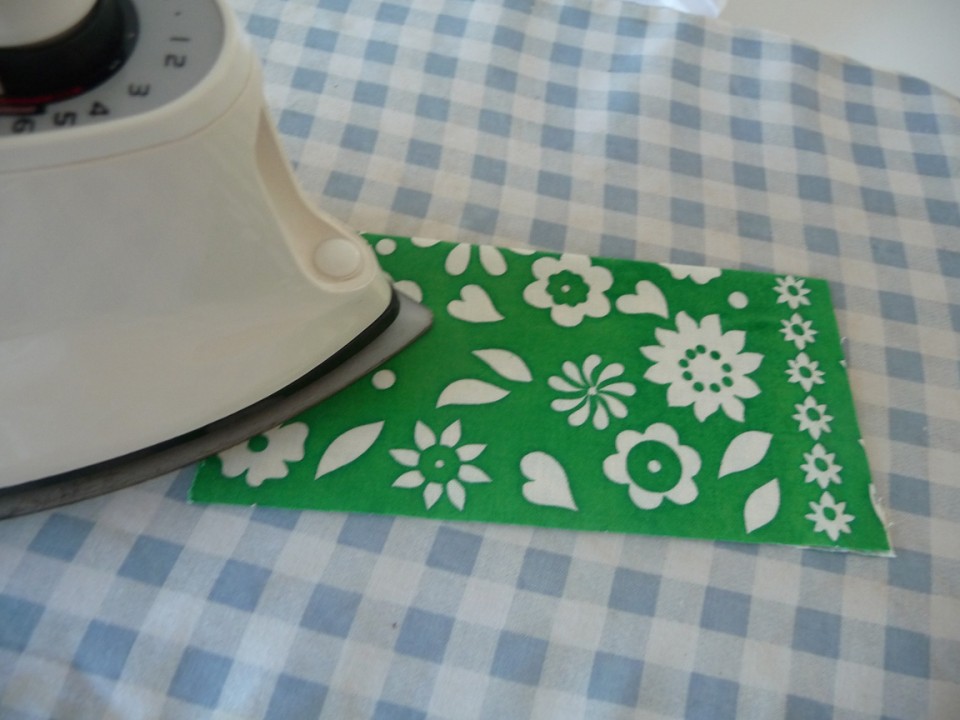
| a selection of cotton prints. Iron before starting the project. | completed project with 30mls green (no.3)and clear appliglue (no.6) |
![]()
how much fabric and appliglue will be needed
1. A piece of fabric 22cm x 22cm for the base of the patchwork design.This is the least important piece in terms of colour.
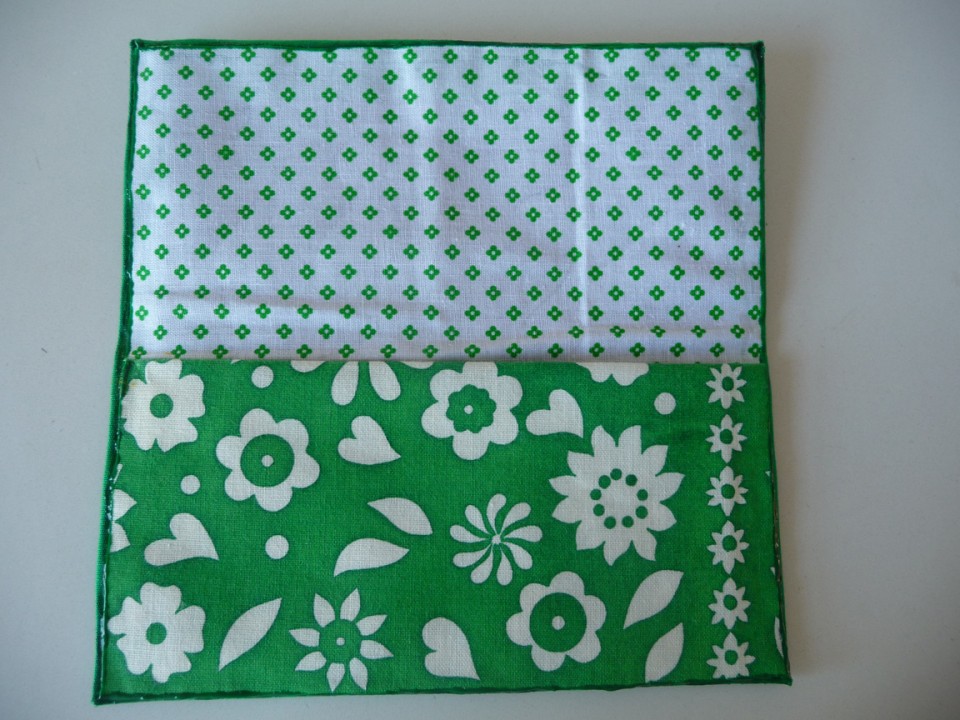
2. Another piece of the plain coloured fabric 18cm x 18cm to line the back of the completed design. This one becomes the inside of the glasses case. In our case it's the white one with little dots of green.
3. A piece of 2oz wadding 19cm x 19cm. We didn't have wadding so used a piece of fleece from the bottom of the fabric box.
4. For the patchwork pieces: a maximum of 15cm square of each fabric. If preferred, every patch can be a different colour.
5. Appliglues: 30ml Clear (No. 6) and 30mls of a colour to match your fabric.
6. Two 1cm squares of velcro to keep the case closed. For ours, nothing was used from preference.
method
Secure the 22cm square of fabric to a piece of stiff board with masking tape.
 |
 |
 |
 |
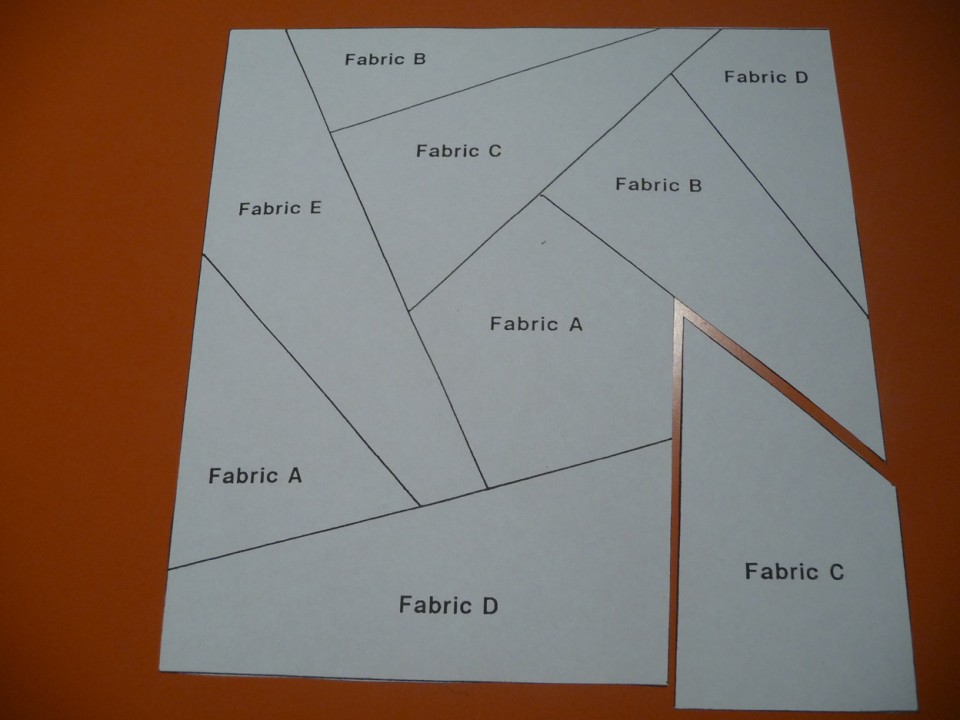
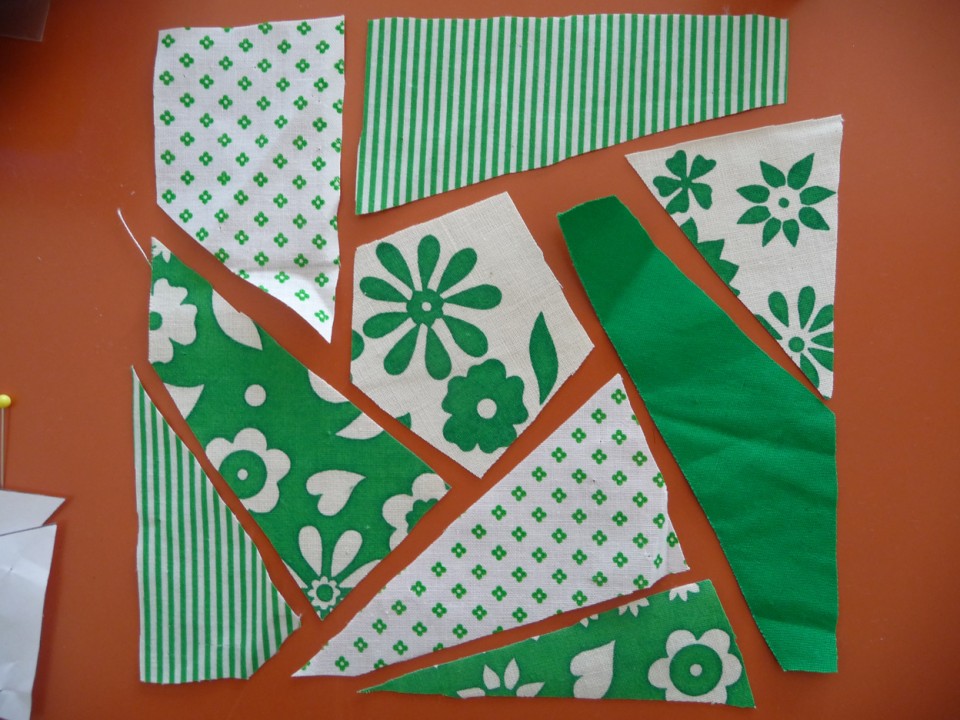
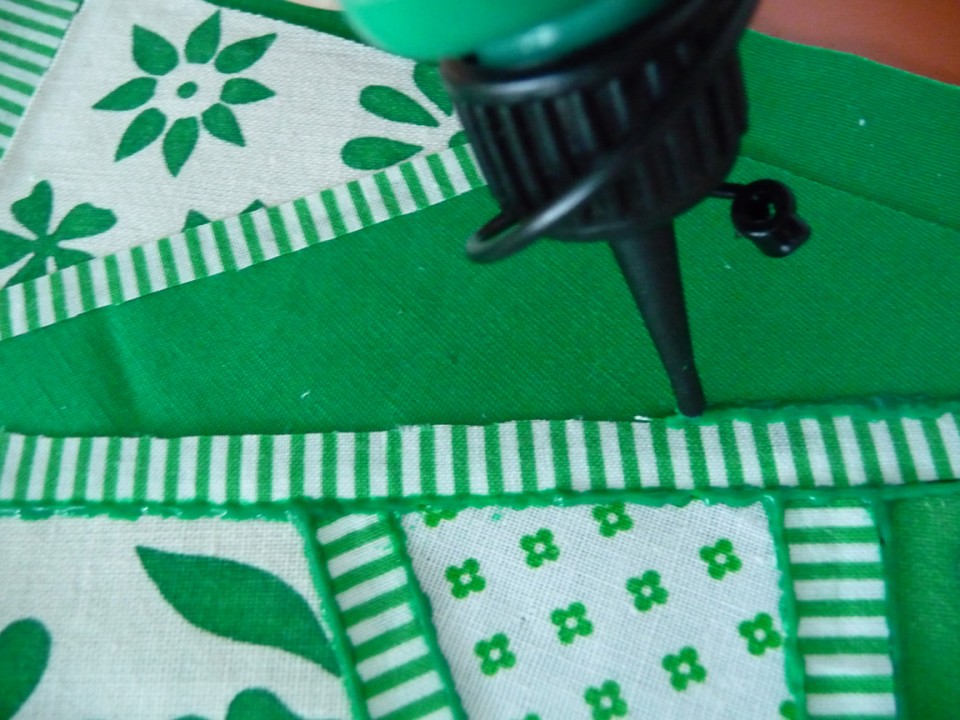
| Print out the pattern. Cut the paper pattern along the lines into individual pieces and pin these onto theright side of the patterned fabrics. | Carefully cut out the fabric pieces. Replace in position to see whether you're happy with the way it looks. If you haven't ironed the fabric pieces, iron them now! | Remove one piece. Scratch a thin line of the clear glue along the outside edge on the underneath of each piece. Replace. Continue with the next piece until all have been glued. | Position the patchwork pieces on to the centre of the 22cm square without letting them overlap so that you have a 2cm border of the base all round. Starting from the top, glue each piece in place |
 |
 |
 |
 |
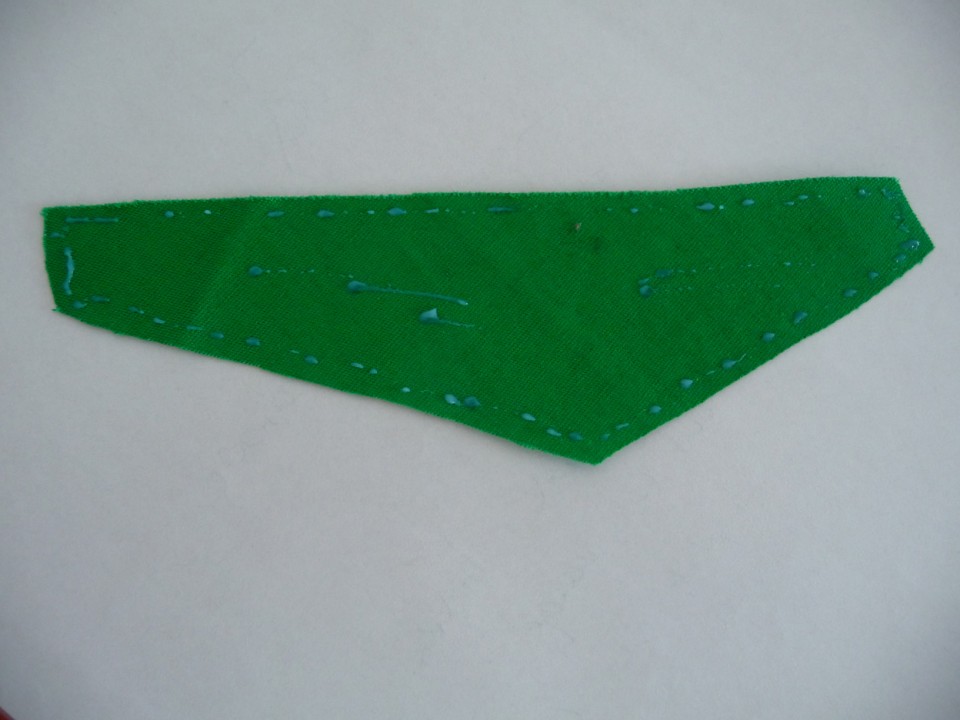
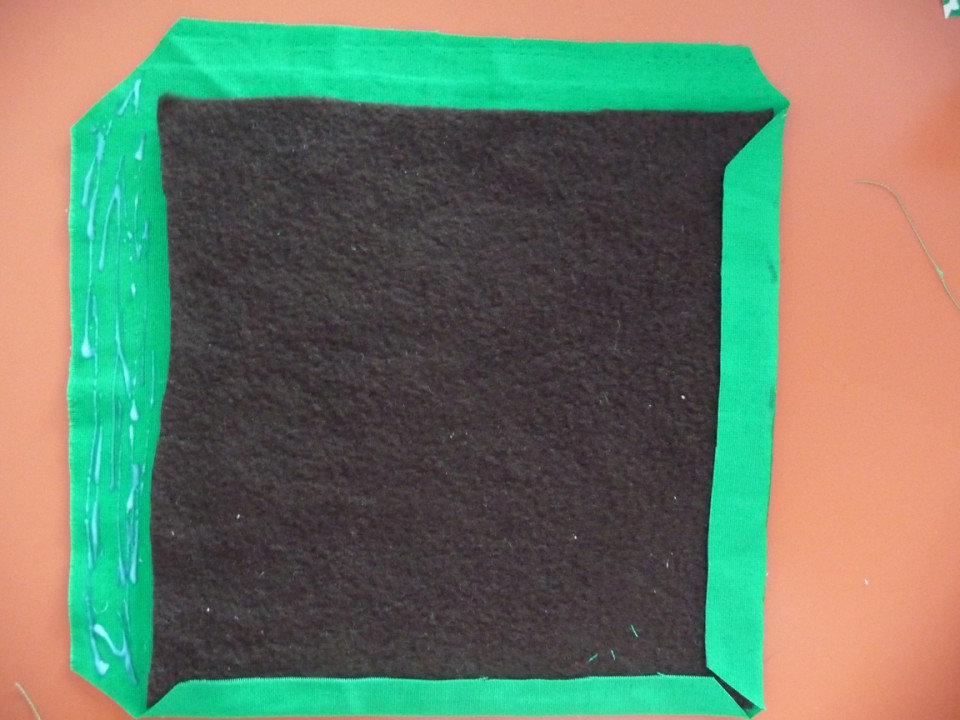
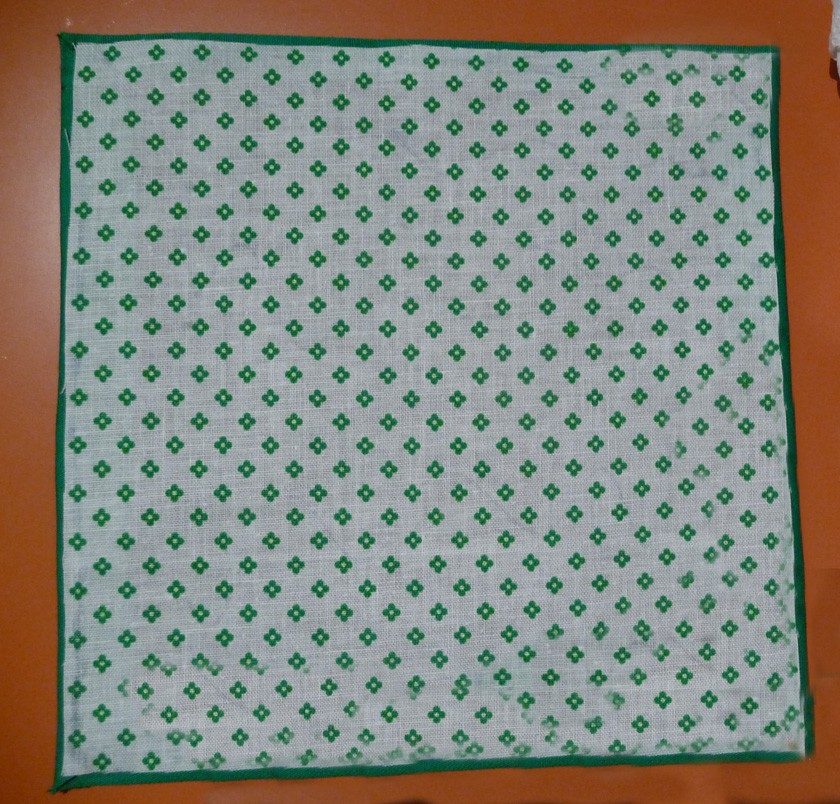
| Choose the colour which will give the threadlike finish to the edges of the fabric pieces. Starting from the top, apply the coloured Appliglue around all the exposed edges of the patchwork design. Leave your project to dry for 4-6 hours. | Turn over. Place the 19cm square of wadding in the centre.and turn a 1.5 cm hem all round. Mitre the corners. Sratch a little clear glue along the edge of the hem and press the hems lightly into the wadding to hold it in place. | Then, take the 18 x 18cm smaller square of fabric which will cover the wadding and hide the raw edge. Scratch a little clear glue along the underneath edge of the fabric and glue it in place.Finish off the edge with your chosen colour. | When dry, turn it over, and admire your handiwork. Tidy up the edge with Appliglue if necessary. Wait for it to dry. |
 |
 |
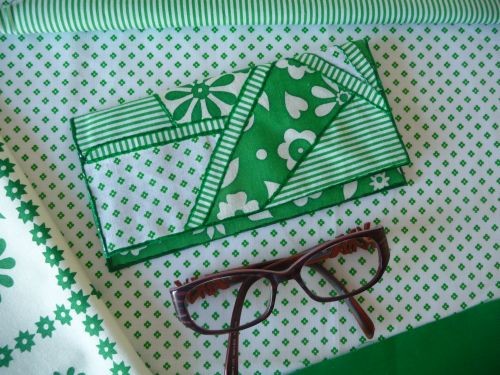 |
| to make the pocket for your glasses, fold the square of patterned fabric in half with the wrong sides together and iron. Run a little of the clear glue along the inside edges of the pocket and stick the sides together. | position the pocket so that it covers half of your lining with the folded edge of the pocket going across the middle of the case. The other half of the case becomes the flap, which will be folded over. To secure the pocket, run a little of the clear glue along the underneath edges on three sides, leaving the folded edge free. This forms the pocket. Using the coloured glue, go round the same three edges of the pocket and lining. | once dry, use the clear glue to stick the small pieces of velcro just inside the corners to keep the flap of the case closed. We elected not to do that step |
.


