blog - doll's wardrobe
Springtime is the right time for a little DIY and interior decorating in the Doll's house
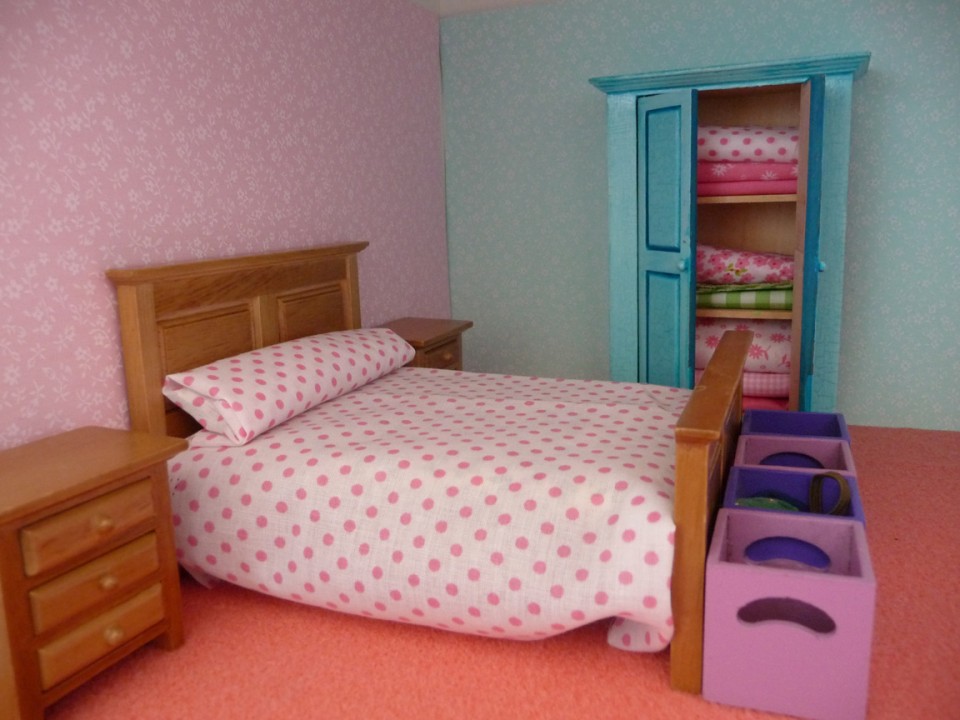 |
| This time it is the bedroom cupboard. Just observe how easily it takes shape. |
|
|
 |
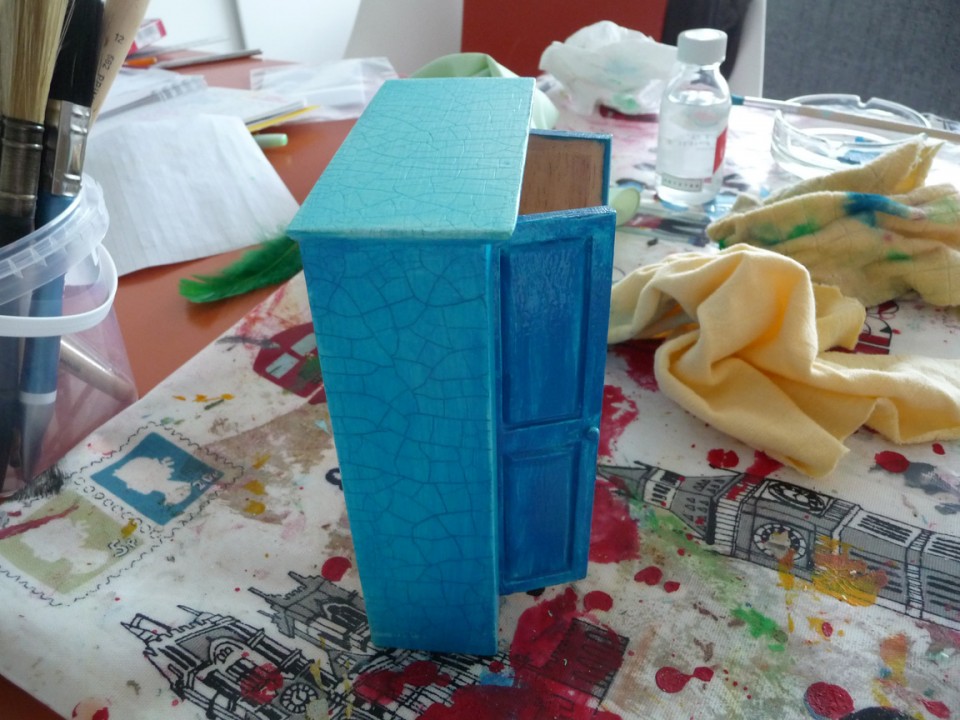 |
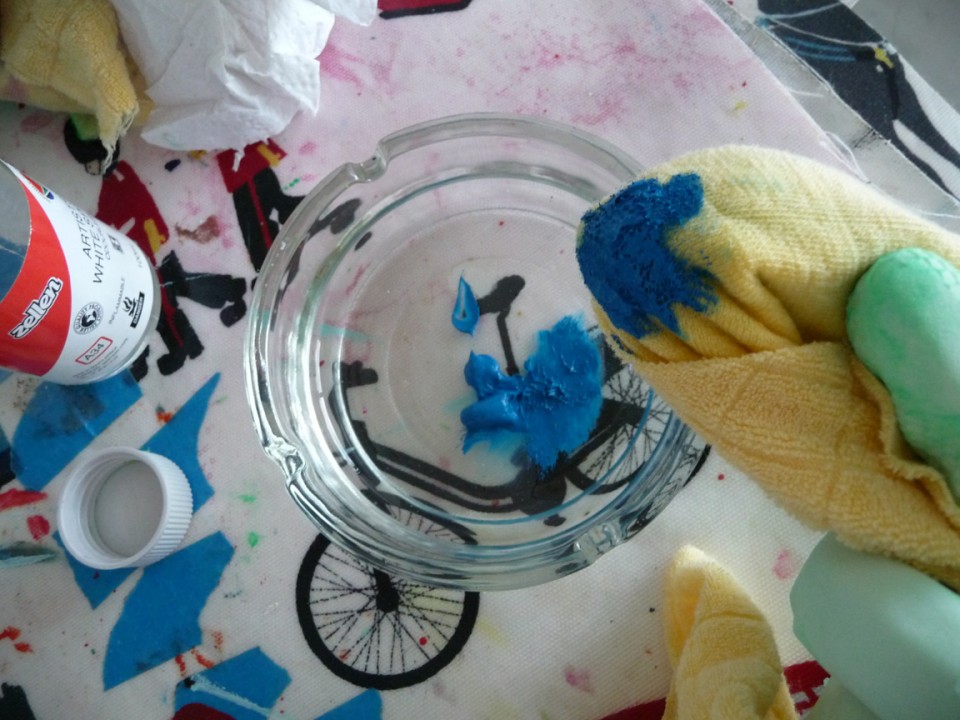
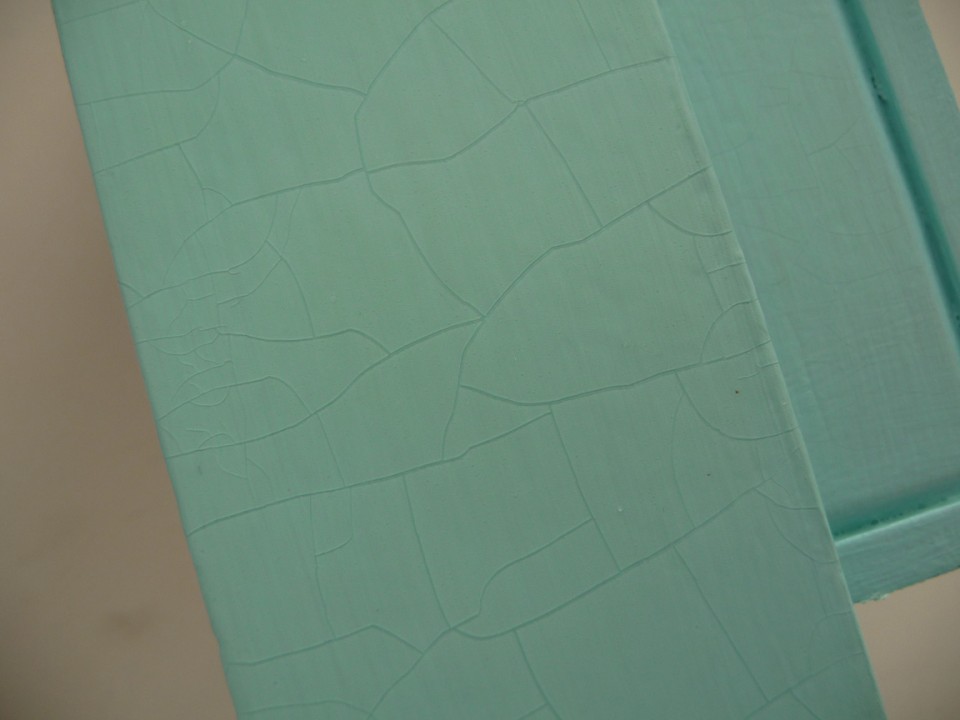
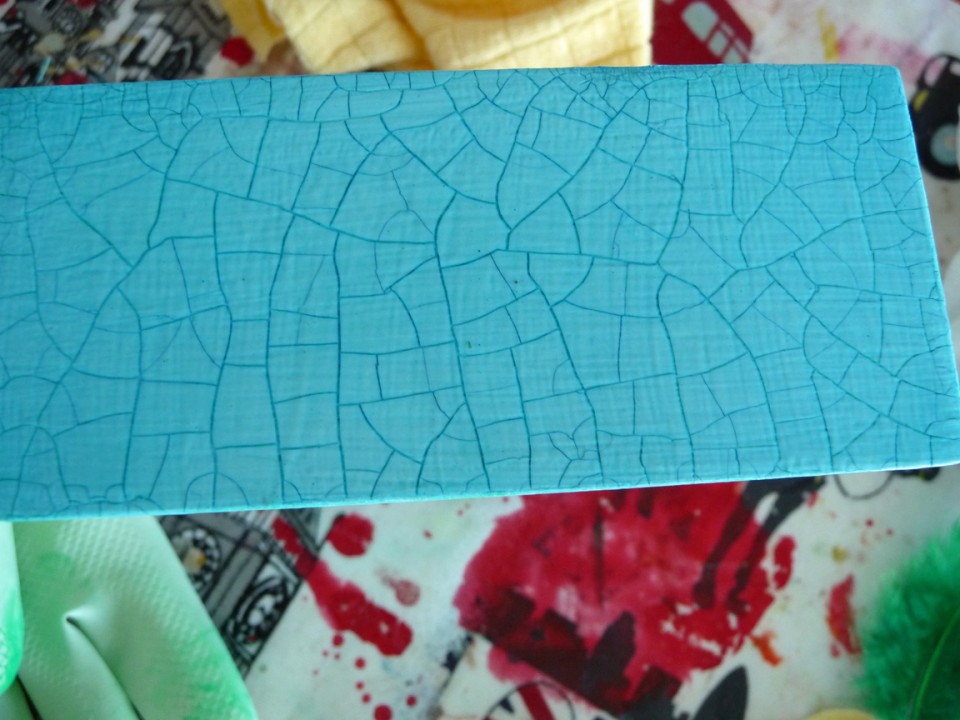
| If you look carefully you will see the hairline cracks created by painting Step 1 Small Crack, followed by Step 2 on to an emulsion base. Wait until each coat is dry before applying the next coat. Here we simply used a tester pot from a DIY store as the base colour. | This shows the size of blob of artist colour which is squirted into the container. I wrapped a piece of thin towelling around my fingers and wet it slightly with white spirits. Then I dipped that into the artist oil colour. We wanted a bright and breezy look so we used a bright blue artist oil colour for the cracks. | Wipe this liberally all over the piece making sure that the artists oil colour is in all the cracks. In this photograph the oil colour hasn't been wiped over the top section of the cupboard yet. |
 |
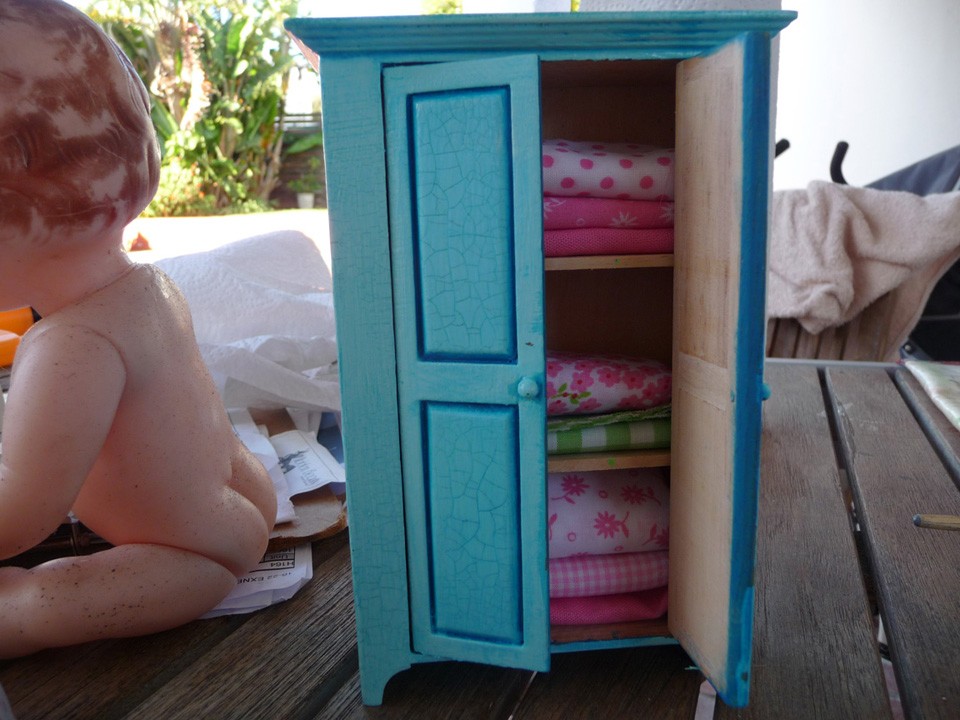 |
| Leave the piece for an hour or so and then wipe the surface gently with a dry cloth. It will depend on the look you want to achieve and how much white spirit was used. Here is an example of what the crack looked like after the excess artists colour had been wiped off. | After the whole cupboard had been wiped down, it was ready to be packed. I cut squares of different colours of fabric which have proved to be a huge success and been used for a myriad of creative play ideas from picnic cloths to swadling cloths for the toy pets. |
If it all goes wrong, don't dispair.
Below is the rescue operation.
 |
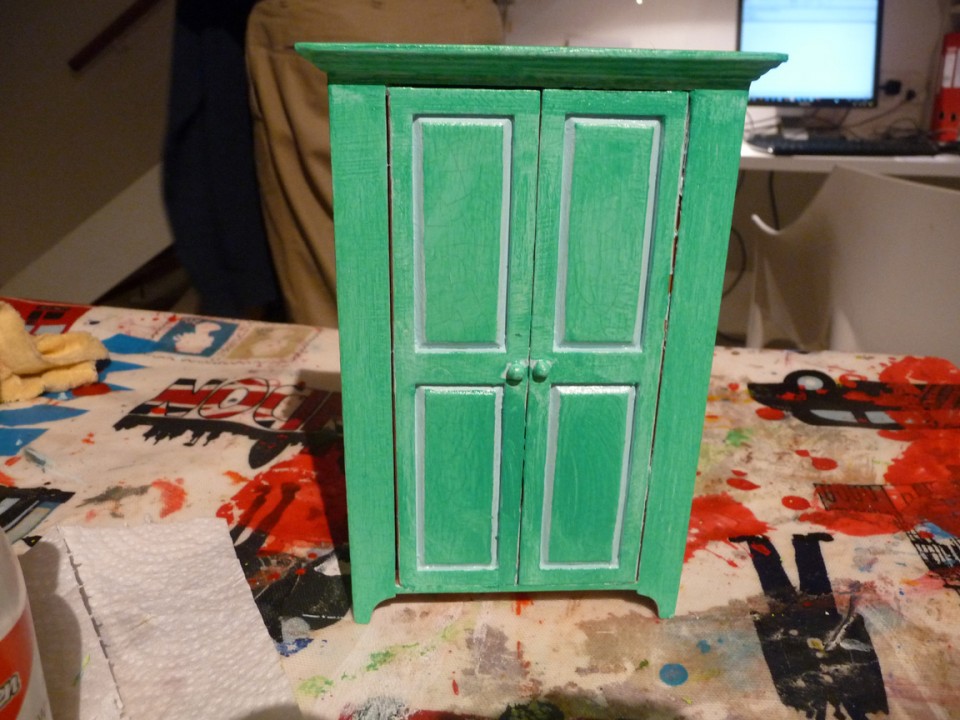 |
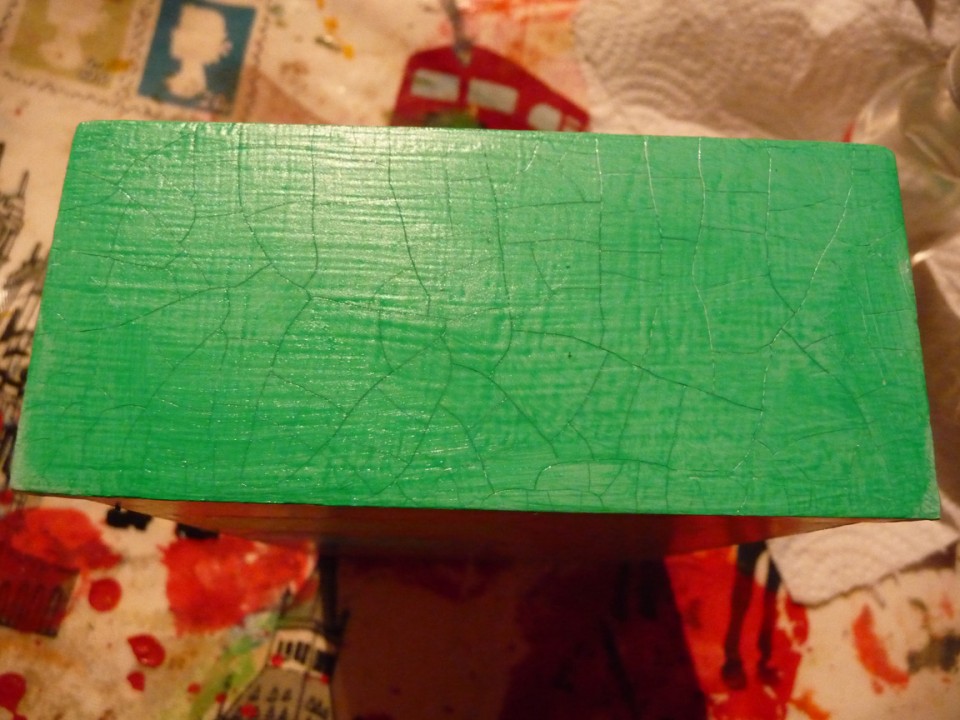
| Initially the "VIP little person" for whom the interior decorating was being completed decided that there was no doubt that green was her colour of choice. Here you can see a close up of the craquelure finish in green. No sooner was the cupboard completed than we decided we hated it. | Wasting no time and using the white spirits I rubbed off the artists oil colour. When dry, the cupboard was sanded down, wiped with a damp cloth, and repainted with the blue emulsion. Now it is totally loved! Success! Perhaps I will be employed again! |
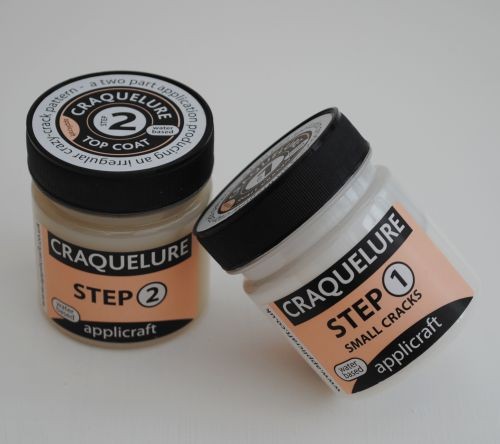
we've put together this pack - a 100ml Step 1 (small crack) and a 100ml step 2
at 10% off the normal price - all you need to complete your project - click here to buy
previous posts;